Having a reliable backup solution for your website is crucial for safeguarding your data and ensuring your website stays secure, even in the face of unexpected issues. In this tutorial, we will guide you through the process of backing up your website using UpdraftPlus, one of the best WordPress backup plugins available. Follow this simple step-by-step guide to make sure your wordpress website is protected!
Why Website Backups are Essential:
A website backup serves as your digital safety net. Whether you’re dealing with malware, a hosting failure, or even accidental errors, a backup allows you to restore your site quickly and minimize downtime. Regular backups ensure your hard work is always protected and easily retrievable.
Step 1: Install UpdraftPlus Plugin
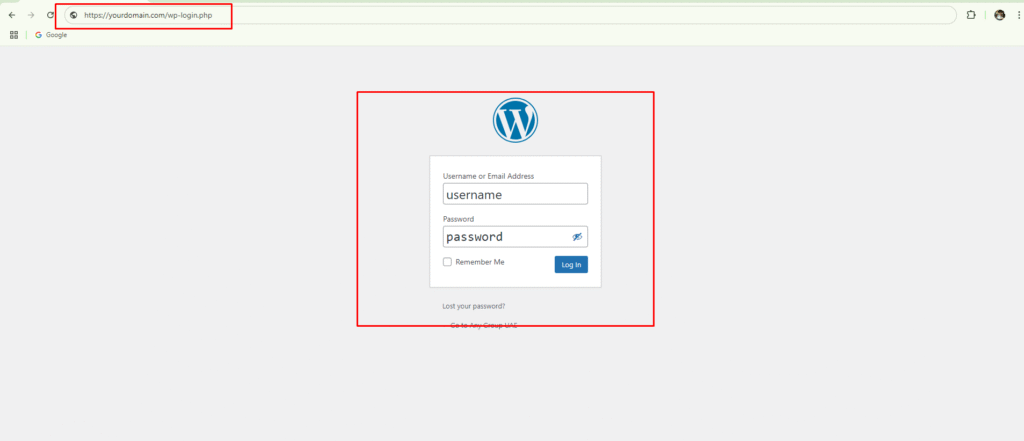
- Log in to your WordPress Dashboard:
Start by logging into your WordPress admin panel.
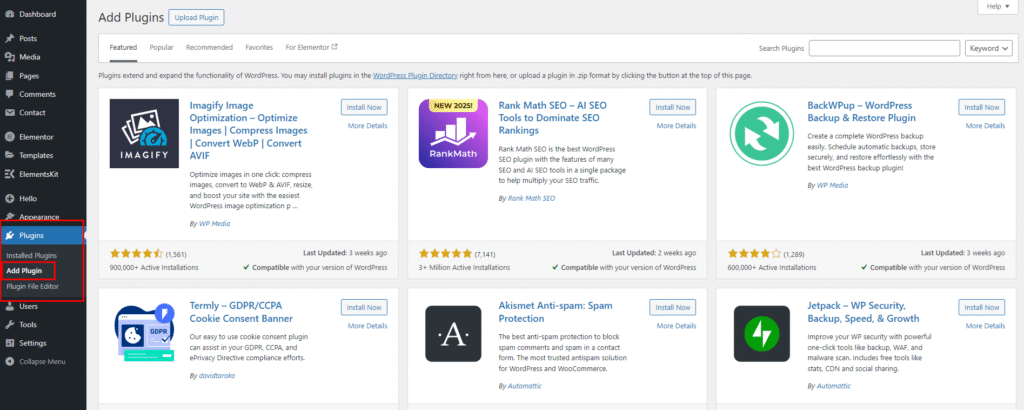
2. Navigate to the Plugin Section:
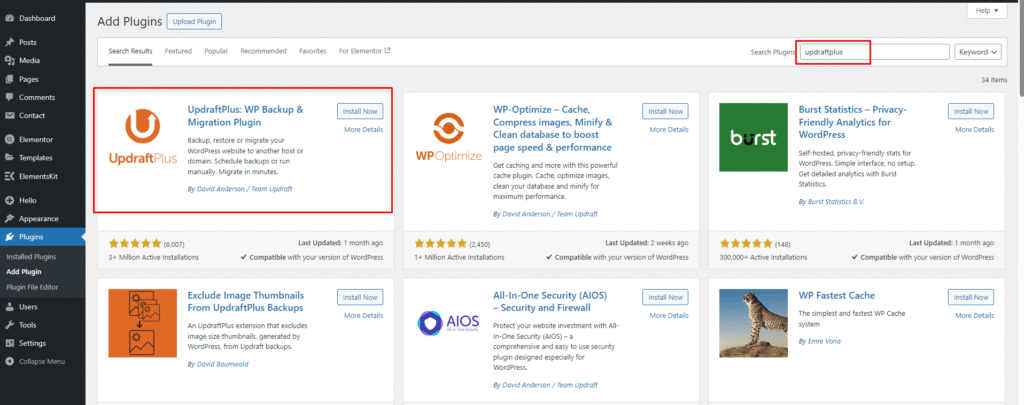
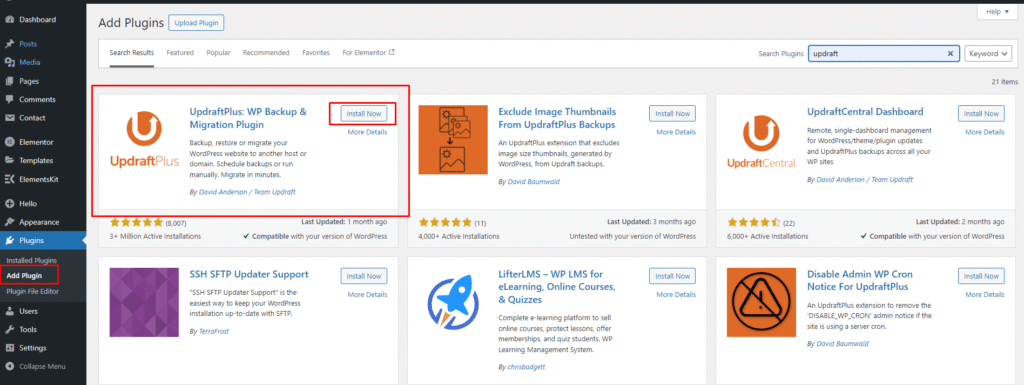
On the left sidebar, click on Plugins > Add New.
3. Search for UpdraftPlus:
In the search bar, type “UpdraftPlus” and press Enter.
4. Install the Plugin:
Click on the Install Now button next to UpdraftPlus, then activate it once the installation is complete.
Step 2: Configure UpdraftPlus Settings
- Go to UpdraftPlus Settings:
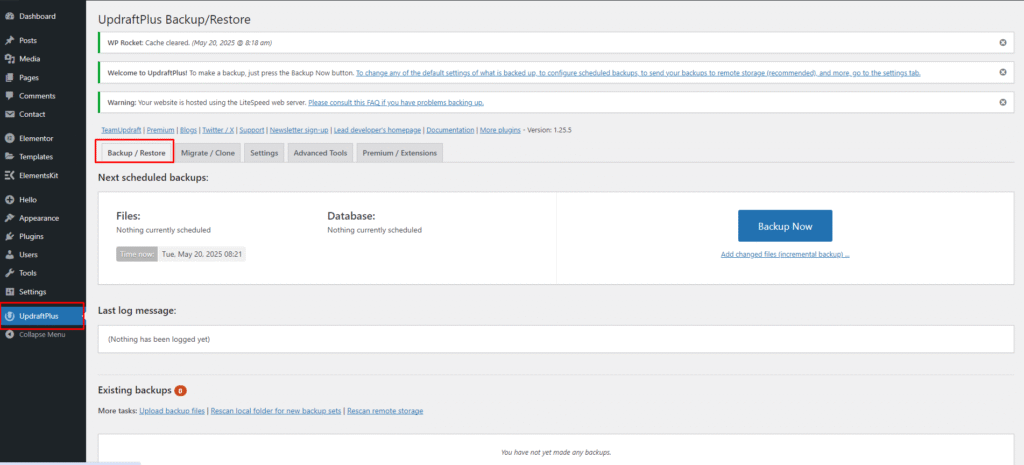
After activation, you’ll see a new menu item called UpdraftPlus. Click it to open and then click on Backup / Restore option.
Step 3: Run Your First Backup
- Manually Back Up Your WordPress Website:
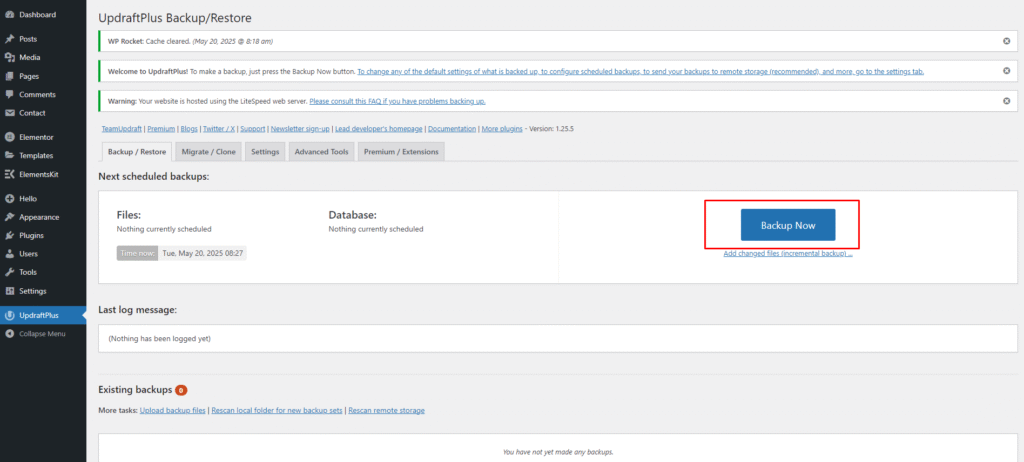
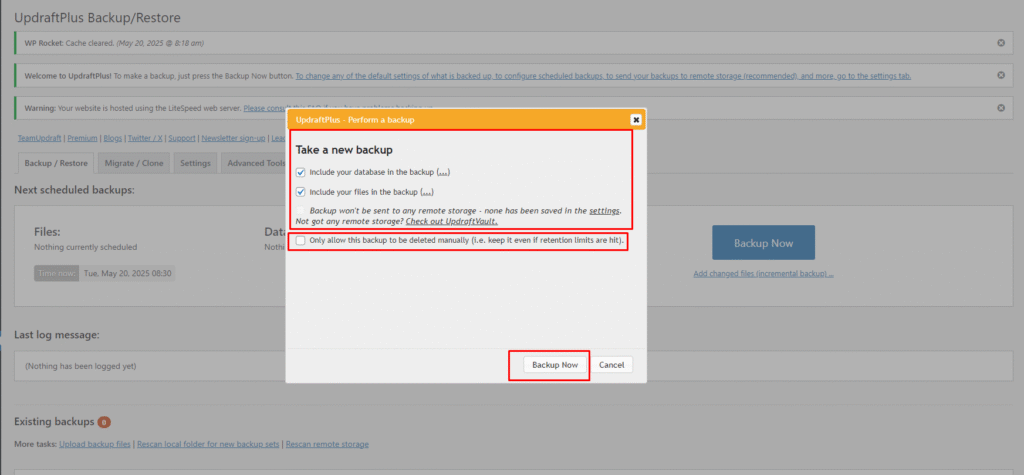
After setting everything up, it’s time for your first backup. On the UpdraftPlus settings page, click the Backup Now button.
- Select Backup Options:
A pop-up window will appear asking if you want to back up the files and database. Make sure both options are checked and hit Backup Now to start the process.
Note: If you want to keep backup then click on Only allow this backup to be deleted manually.
- Wait for the Backup to Complete:
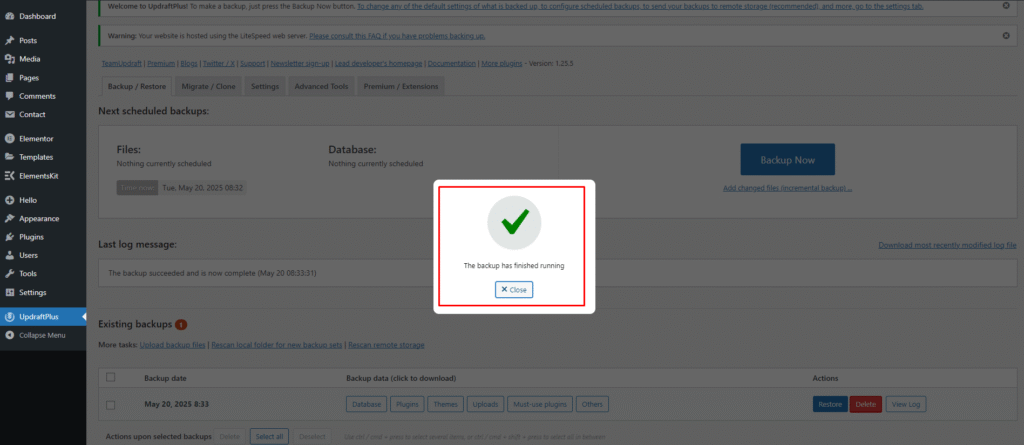
The backup process may take some time, depending on the size of your website. Once it’s completed, you’ll see a message confirming that your website has been successfully backed up.
Step 4: Restore Your Website (If Necessary)
- Go to the Backup Tab:
To restore your website from a backup, go back to Settings > UpdraftPlus Backups and click on the Existing Backups tab. - Restore Your Files:
You’ll see a list of your backups. Click on the Restore button next to the backup you want to restore. - Select What to Restore:
You can choose to restore just the files or the database, or both. Select your desired option and click Restore. - Wait for the Restoration Process:
After restoring your website, it may take a few minutes for everything to be restored. Once completed, your website will be back to its previous state.
Conclusion:
Backing up your website with UpdraftPlus is a straightforward yet essential task that provides peace of mind. By setting up regular backups for your wordpress website, you ensure that your site is safe from unforeseen disruptions. With UpdraftPlus, your website’s data is always just a click away from restoration, protecting your content and ensuring a quick recovery.
Looking for create a custom wordpress website for your business? Explore our wordpress website development service We will make a best website for you.
